SENSORIMOTOR EXERCISES

What can you do to improve your sensory-motor skills?

The eyes which are outgrowths of the brain exert a considerable influence on general body functions and behavior. No fewer than 6 pairs of the brain’s 12 pairs of cranial nerves are involved in the process of vision. The bulk of what a sighted person does, and learns, is regulated by the ocular sensorimotor system and its relationship to vision information processing and general brain function. Ocular and visual processing efficiency are reduced when general body fitness is not optimal.   

Nobody doubts the value of physical and mental fitness, but finding a program of regular physical exercise that is interesting, not excessively time consuming, and effective is a major challenge.  The following exercises have been designed to improve sensory-motor integration under the control of vision. They represent an essential element of baseline fitness. 

Their purpose is to coordinate seeing, hearing, moving, balancing, breathing and thinking. The exercises do not attempt to build muscle, but rather to build skills of mental and physical coordination.  

In order to gain the most benefit from this routine, attention should be paid to the following: 

  • ensure the correct body posture and balance before starting each exercise*
  • exercise at a level that feels comfortable and stop any exercise that causes pain*
  • all breathing must be conscious,  in and out through the nose, full and deep, slow, unforced and in rhythm to the movements of the body exercise* 

Exercises Copyright © Dr. Selwyn Super

Ready To Start? Let’s Do It!

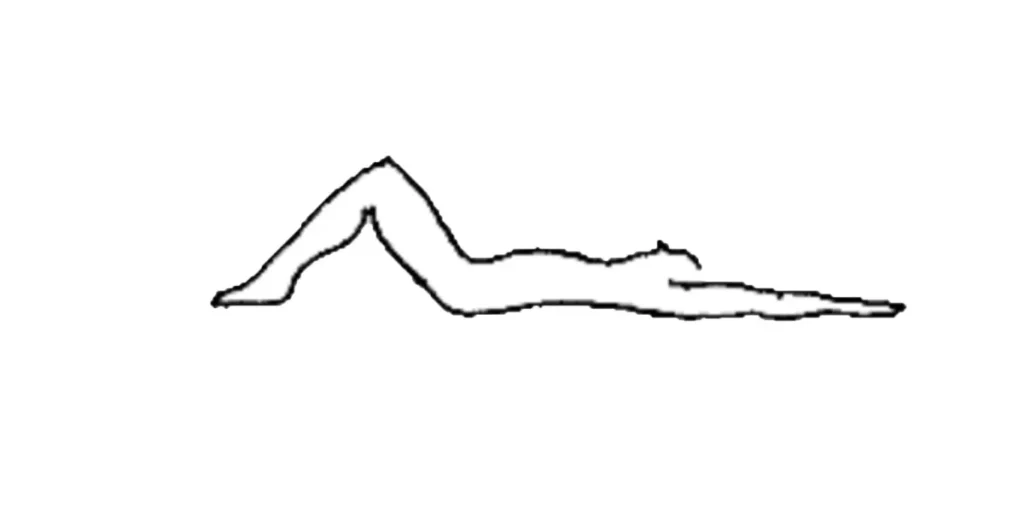
Exercise 1: Press Up Exercise
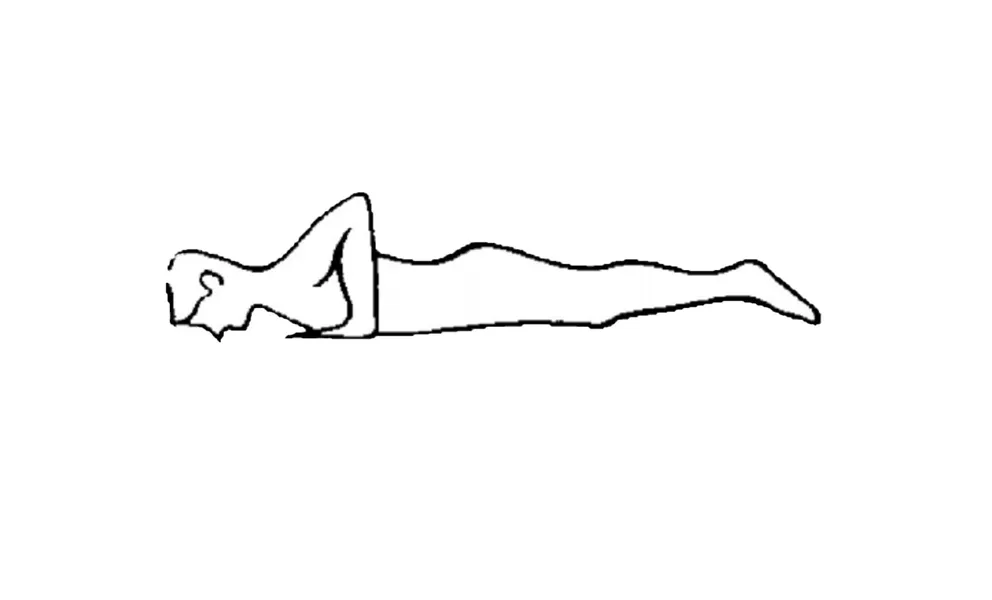
Step 1

Commence the exercise lying on the stomach, with hands palms down on the floor under the shoulders, and with your nose resting lightly on a brightly colored knitting needle. The needle should be placed lengthwise in line with the length of your body. In this position of the exercise, the needle should appear blurred and double.   

Step 2

Now raise the upper part of your body while breathing in through your nose and while straightening your arms and keeping your knees on the floor.  Concentrate on the needle and notice that it loses its blurred and double image and appears clear and single.  Now bend your arms while gently lowering yourself to the floor. Concentrate on the needle and notice when it starts to go blurred and double. (The distance from the floor where the needle appears to go blurred will be influenced by your age and any refractive error you may have. The distance from the floor where the needle appears to go double will be dependent on you ability to converge your eyes, (i.e. the ability to turn your eyes inwards)).

Conclusion

Do as many press ups as feels comfortable. Remember to do the exercise slowly and as rhythmically as possible and paying simultaneous attention to your breathing, thinking, balancing, seeing, hearing and moving.  

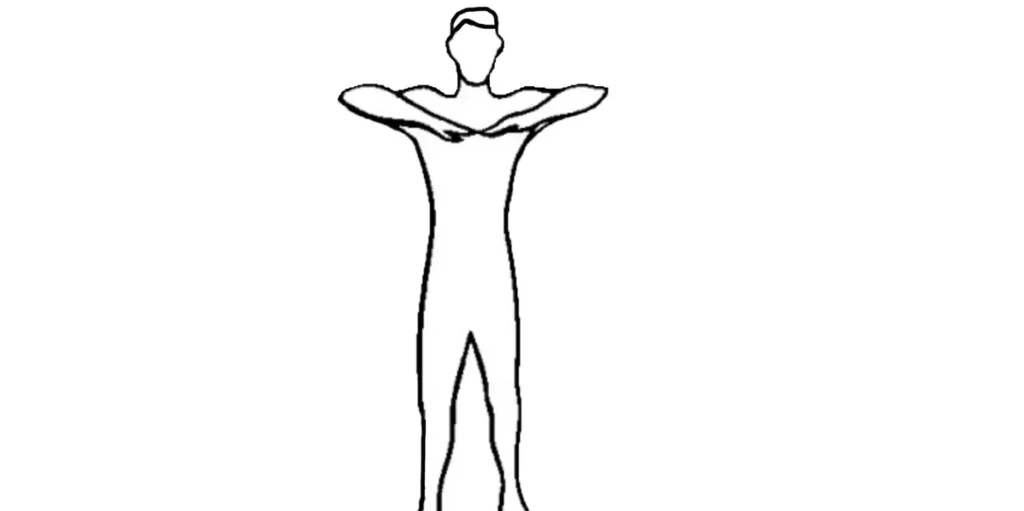
Exercise 2: Horizontal Arm Swinging Exercise
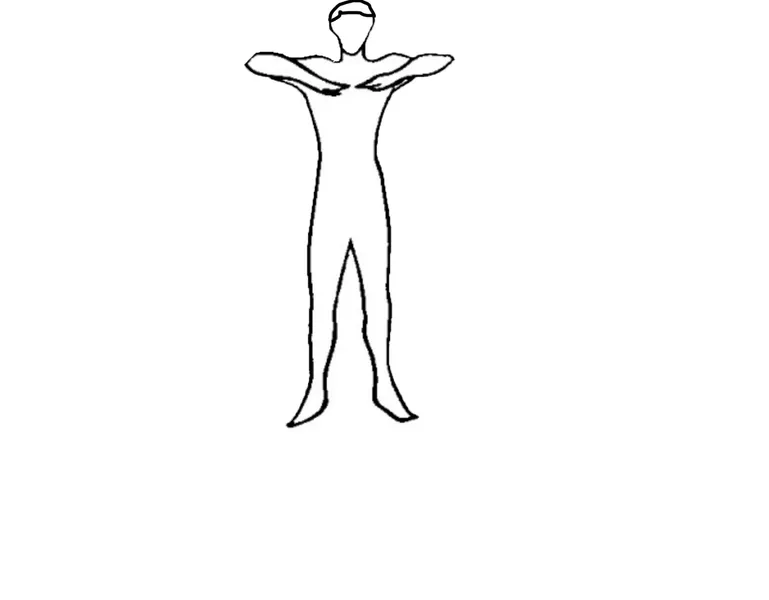
Step 1

Commence the exercise standing erect with the feet apart and your arms raised to shoulder level with your elbows bent so that your hands touch each other, palms down, on your chest.
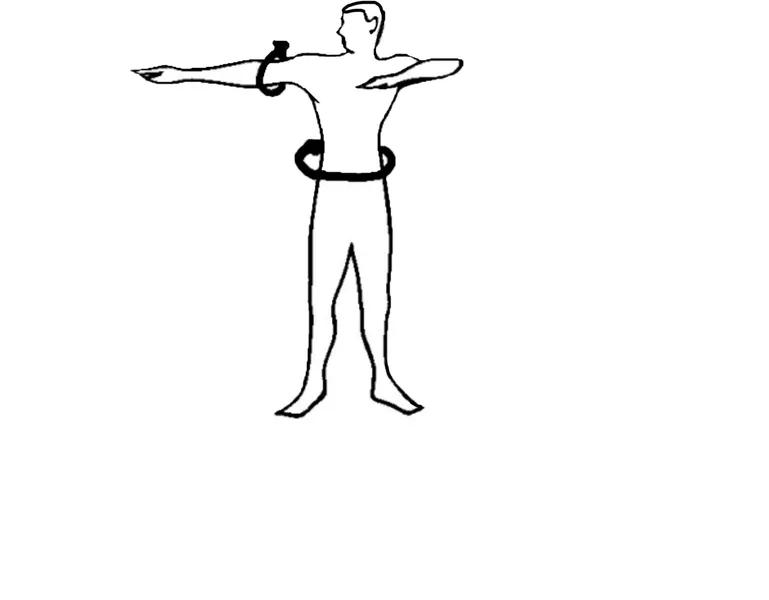
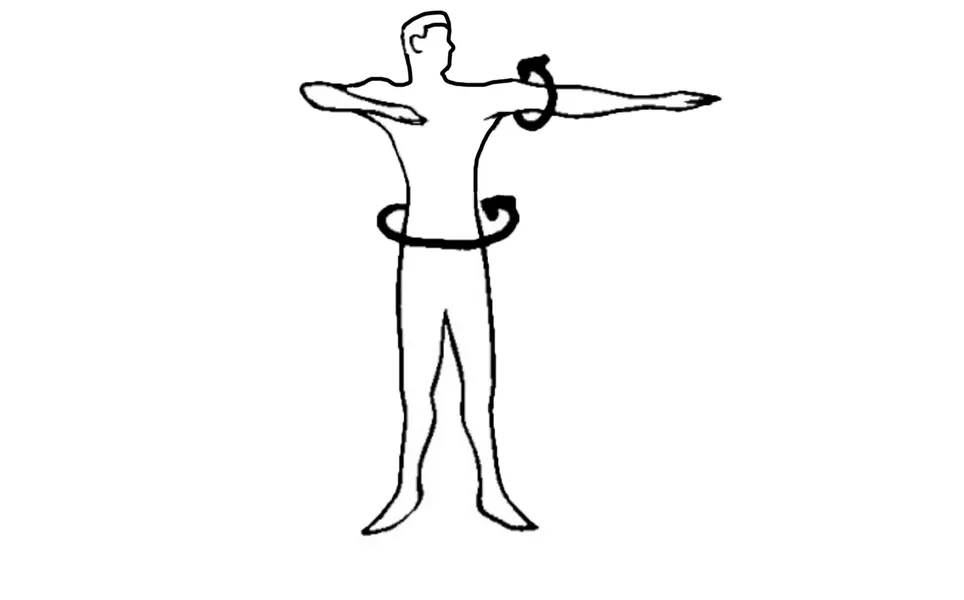
Step 2

Now while your left arm remains passive, straighten the elbow of your right arm and swing your arm outwards in a horizontal arc as far backwards as possible, moving your trunk from the pelvis in the same direction.

The visual component of this exercise requires you to focus on the shoulder of the right arm as it is being swung in its horizontal arc both backwards and forwards and then to do the same for the left arm. 

Step 3

The right arm is then swung back to the original position where both hands touch each other on the chest. 

Now carry out the same movements for the left arm, while the right arm remains passive.

Step 4

The focus is then changed with each successive rotational backwards and forwards swing, so that the elbow, then the wrist, then the finger tips are focused upon and then, lastly, looking into the far distance along the line of the arm being swung.   

After these five swings have been completed, looking successively at the different focal points, a new cycle of arm swings can be conducted, starting first by looking along the arm into the far distance and then successively with each swing, focusing on the finger tips, wrist, elbow, and shoulder of each arm being swung. 

Conclusion

The breathing in this exercise may be conducted in two ways, i.e. breathing in, while swinging the arm outwards and breathing out while swinging the arm inwards towards the front, or by doing this in reverse.

By carrying out the visual and breathing components in two different ways described, you will have swung your arms some forty times in all. 

Remember to do the exercise as rhythmically as possible and paying simultaneous attention to your breathing, thinking, balancing, seeing, hearing and moving.  

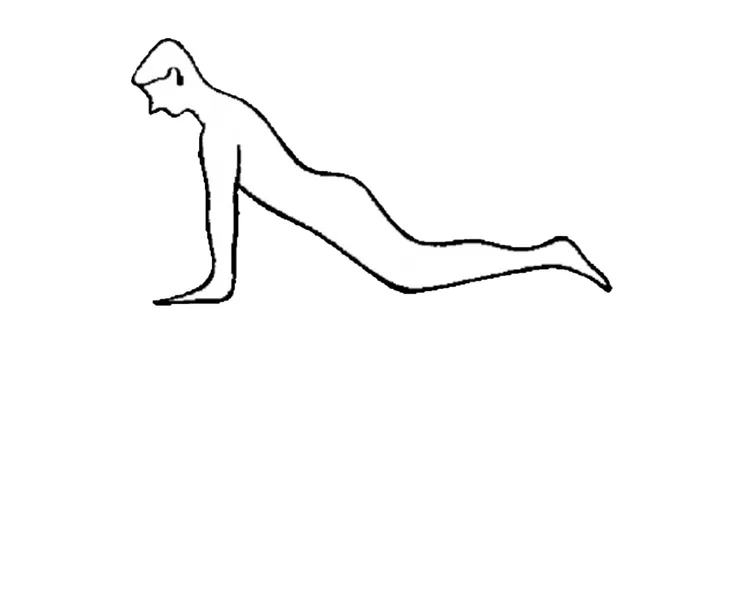
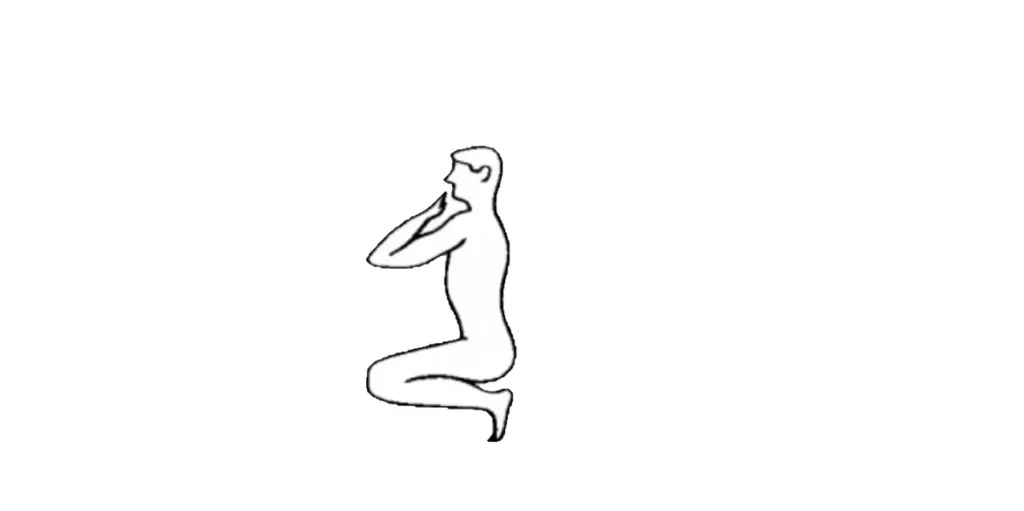
Exercise 3: Knee Squat Exercise
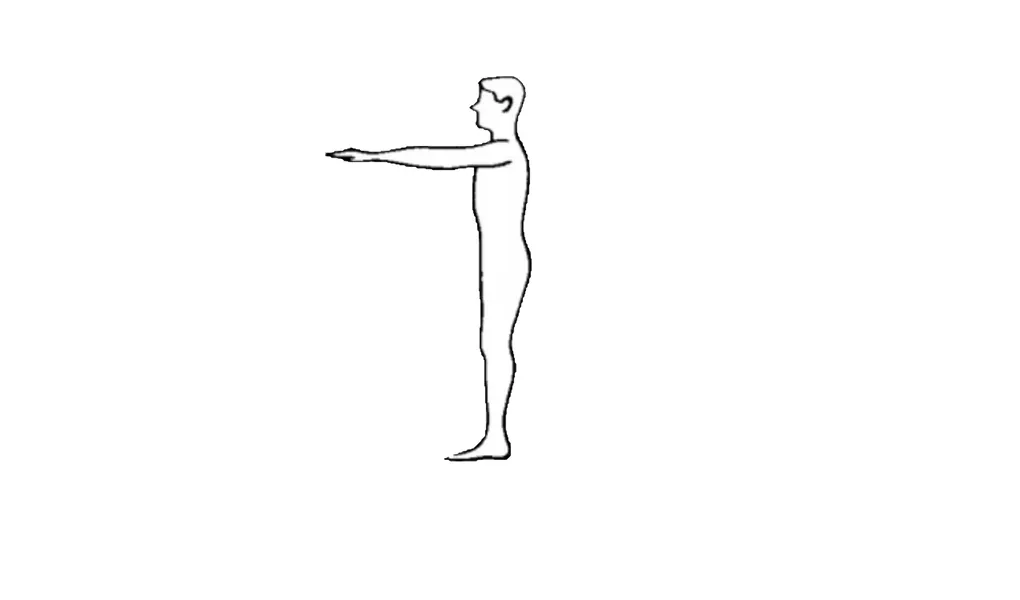
Step 1

Commence the exercise standing erect with legs together and your feet turned slightly outwards and your arms stretched outwards parallel in front of you at shoulder height. The palms of your hands should be facing downwards in this position. Now look toward a distant, vertical object. (It could be an image of yourself in a long mirror in your room or a tree-trunk or a lamp-post  outside your window).
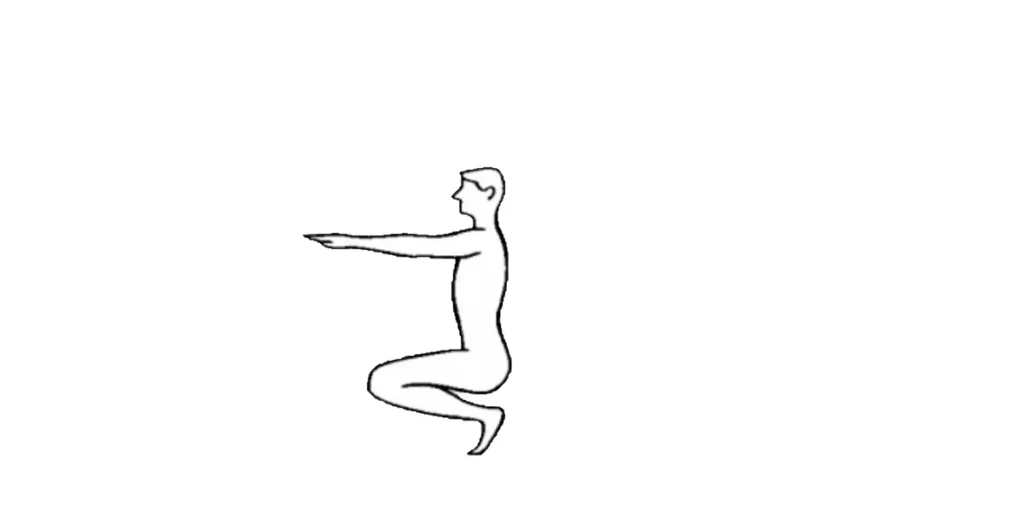
Step 2

Concentrate on keeping the distant object in clear focus as you bend your knees to go down to a knee squat position. By lifting your heels off the ground and standing on your toes, this should help you retain your balance and to keep your back straight and vertical.    

While going down to the knee squat position, your arms should remain stretched out parallel in front of you at shoulder height. 

Step 3

When you have reached the knee squat position and you are sitting on your haunches as far as possible, bend your elbows so as to bring your hands together, palms down at shoulder height, which should be in line with the bottom of your nose. The tips of your middle fingers should touch each other gently at a distance closest to your eyes where they can still be seen clearly.  It should be noticed at the same time that the distant object which you were looking at while going down into the knee squat position, is now very blurred and should also appear double. 

Step 4

Now straighten your knees and rise slowly to the upright position keeping your elbows bent and your focus at the point where your two middle fingers touch close to your eyes. It is now time to straighten your arms again at shoulder height, parallel to each other and with hands palms down and to redirect your focus to the far distant object. Be conscious of the length of time that it takes to bring the object you are looking at into clear focus, and for the double images to merge into one.  If the distant object does not appear double when you are looking at where your middle fingers meet, this means that your eyes have not converged properly and binocular vision with the two eyes working together is not being achieved. 

Conclusion

Now reverse the procedure so as to be looking near on going down into the knee squat position and to be looking far on coming up. Again do as many knee squats in this way as feels comfortable. 

Remember to do the exercise as slowly and rhythmically as possible and paying simultaneous attention to your breathing, thinking, balancing, seeing, hearing and moving.

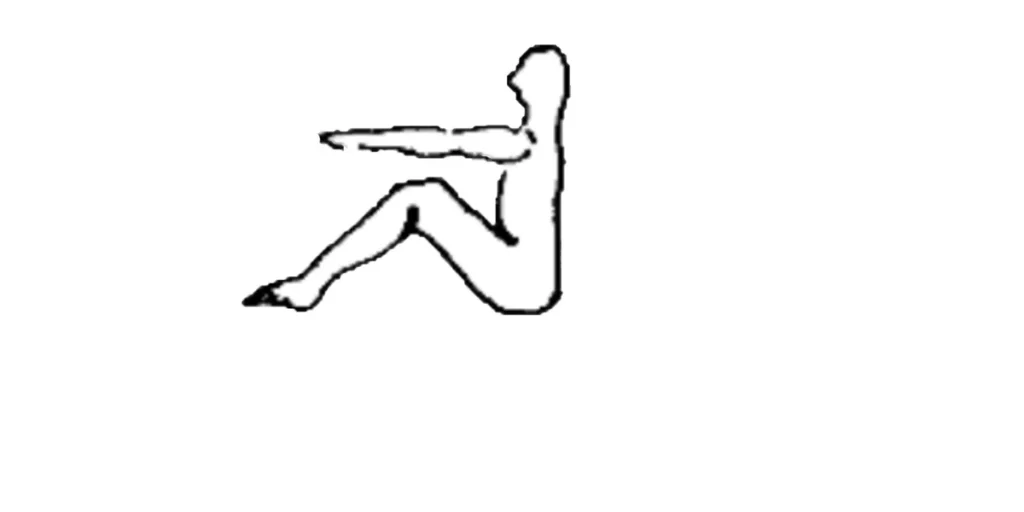
Exercise 4: Trunk Raising and Lowering Exercise

Step 1

Commence this exercise lying on your back with your legs together stretched out in front of you, and your arms stretched out behind your head. The palms of your hands should be facing upwards and your hands should be touching each other lightly and resting on the floor. In this stationary position, look behind you as far as possible at a distant object and breathe in slowly through your nose until your lungs are full and you cannot hear the sound of the air you have been inhaling anymore.

Step 2

Now sit up slowly moving your arms over your head at the same time, until you reach a position where your arms are stretched out in front of you and are parallel to the floor. As soon as you start moving you should breathe out slowly through your nose until your lungs are completely empty and you cannot hear the sound of the air you have been exhaling anymore.  As you start moving your arms over your head, focus on your two touching hands as they come into sight and keep focusing on your hands until you are sitting up with your arms in front of you and your palms are now facing downward.  While stationary, look as far in front of you as possible at a distant object and breathe in through your nose until your lungs are full and you cannot hear the sound of the air you have been inhaling.

Step 3

Now change your focus to where your hands, palms down are touching and while moving back to the floor commence breathing out through your nose while stretching your arms back over your head to reach the resting on the floor position. At the same time you commence moving back to this resting position, straighten your legs so that they will also rest on the floor in the original starting position of the exercise.  

Step 4

Do as may sit ups as feel comfortable. Remember to change the legs position alternating legs straight with knees bent every time you go back to the lying on the floor position and maintaining the one or other leg position as you move to the sitting posture.  Remember, too, to breathe in while you are stationary and looking either far behind, or far in front of you, and to look near at where your hands touch while you are moving and breathing out. 

Conclusion

Lastly, remember to do the exercise as slowly and rhythmically as possible and paying simultaneous attention to your breathing, thinking, balancing, seeing, hearing and moving.

Well Done!

In order to gain the most benefit from this routine, attention should be paid to the following:

  • ensure the correct body posture and balance before starting each exercise
  • exercise at a level that feels comfortable and stop any exercise that causes pain
  • all breathing must be conscious, in and out through the nose, full and deep, slow, unforced and in rhythm to the movements of the body exercise*

Copyright © 2022 Dr. Paul Super OD PC – All Rights Reserved

Ready to Schedule An Appointment?

We look forward to seeing you in our office soon. To schedule an appointment, click the schedule button or give our office a call.

Ten Symptoms That Indicate You May Be Suffering from Dry Eye

Your eyes are constantly producing tears, which is vital to keep your eyes healthy, comfortable, and seeing properly. People suffer from dry eyes because of a chronic lack of lubrication and moisture on the eye’s surface. Tears cover the eye’s surface to keep it moist and wash away dust and debris that could damage the cornea and lead to an eye infection. Read more to learn about the causes and symptoms of dry eye or schedule an exam today to find relief!

Symptoms of Dry Eye 

Dry Eyes, also called dry eye syndrome or dry eye disease, affects each person differently. Individuals may experience only one symptom or multiple symptoms outlined below, but the good news is there is no reason to suffer from these symptoms. 

  1. Burning Eye Sensation
  2. Scratchy or Itchy Eye Sensation
  3. Aching and Sore Eye Sensation
  4. Dry Eye Sensation 
  5. Foreign Body Sensation (Feeling like something is in your eye.)
  6. Fatigued or Tired Eyes
  7. Red Eyes
  8. Light Sensitivity
  9. Excessive Tearing 
  10. Blurred Vision

Some of these conditions may be present at all times or only at certain times. 

Some people may only notice discomfort when trying to wear contact lenses or when they are in windy conditions that cause air to be blowing directly on their face (like when driving with the vent blowing). Whether you suffer all the time or some of the time, we can determine a treatment plan that helps. 

Causes of Dry Eye

Like with many health conditions, eye-related and otherwise, there isn’t one clear cause, but instead many potential causes. Similar to symptoms, some people may have more than one cause contributing to their dry eye symptoms. 

Lifestyle

  • Computer use | When working at a computer or portable digital device, we tend to blink our eyes less frequently, leading to greater tear evaporation.
  • Contact lenses | Many people express exaggerated dry eye symptoms when wearing contact lenses. 
  • Indoor environment | Air conditioning, ceiling fans, and forced-air heating decrease indoor humidity and increase tear evaporation.
  • Outdoor environment | Dry climates, high altitudes, and dry or windy conditions have lower humidity.
  • Air travel | The air in airplanes is intended to be extremely dry.
  • Smoking | Smoke can become an eye irritant. 

Medical

  • Aging | Dry Eye symptoms can become apparent at any age but are more common as people age.
  • Menopause | Post-menopausal women are at greater risk than same-aged men.
  • Health Conditions | Certain diseases can contribute to dry eye problems. This is why it is important to share your complete medical history with your eye care provider. 
  • Medications | Many prescription and nonprescription medicines increase the risk of dry eye symptoms. For this reason, remember to share a full prescription list with your eye care provider. 
  • Eyelid Problems | Incomplete closure of the eyelids when blinking or sleeping can cause severe dry eyes. 
  • Eye Surgery | LASIK, Cataract Surgery, and other corneal refractive surgery can cause dry eyes. However, in most cases, dry eye discomfort after surgery is temporary. 
  • Allergies | Allergies and some allergy medications can cause dry eyes. 
Smoking Causes Symptoms of Dry Eye

If you believe you may be suffering from dry eye, reach out to your eye doctor to schedule an eye appointment to discuss your symptoms and determine a treatment plan that will work best for you.

Ready to Schedule An Appointment?

We look forward to seeing you in our office soon. To schedule an appointment, click the schedule button or give our office a call.

Understanding Your Child’s Vision Development

Vision involves a complex relationship between the brain, eyes, and the nerves connecting them to keep them working together smoothly. Most people aren’t shocked to learn a child’s eyes are not fully developed upon birth. However, some are surprised to learn that a child’s vision development spans many years and some childhood activities can encourage healthy eye development. 

Vision in Infancy

Vision development begins during pregnancy, but it doesn’t get very far. At birth, babies only see black, white, and shades of gray and cannot stare or focus on objects. During the first month, your infant will begin to blink in response to light, track moving objects, and focus or stare at items up to ten inches away. 

As time passes, your child will become even more engaged in their environment and bodies, mostly their hands. Focusing on objects that are further and further away, improving their tracking abilities, and starting to reach for objects. 

Even if everything is developing normally, it is still a good idea to schedule your child’s first eye exam early! Give our office a call to see what age we recommend your child’s first exam. While your child may be unable to speak to the doctor, read the eye chart, or answer one or two when asked which is better, our team can gather information about general eye health and ensure they are on the proper development track. Early detection of eye health and vision problems can help to ensure setbacks in learning and growth don’t occur. 

Early Childhood Vision Development

As your child continues to grow, so do their visual skills. Your child will begin to focus on categorizing and labeling things, such as colors, shapes, and body parts. If your child has vision problems, you may notice issues with their ability to complete these categorizations. However, even if they are doing well, it is still important to schedule your child another eye exam around three years of age. Schedule a comprehensive eye exam before your child enters school to provide enough time to catch and correct any vision problems.

Visual health also has an impact on your child’s physical development. Early childhood is a critical developmental stage when children develop fine-motor and gross-motor skills, including drawing, jumping, catching, kicking, and throwing a ball. 

When your child begins to enter a classroom setting, undiagnosed vision issues may start to take a toll. Even if they are unable to express in words why they are struggling, keep a close eye on the way your child is learning and interacts with their materials and environment. Here are some things you may notice:

  • It takes your child longer than others to complete the same task. 
  • It takes your child longer than others to learn something. 
  • If your child begins to complain of headaches or tired eyes. 
  • Your child begins squinting or frequently rubbing their eyes. 
  • Your child starts tilting their head, holding things too close to their face, or closing one eye to see. 
  • Or if your child begins avoiding activities that require near or distance vision.

Undetected vision problems can cause developmental and educational delays, so it’s important to schedule eye exams every year once your child turns three unless directed by your eye doctor. Your child needs to have all of the necessary tools required to succeed, and we can help! Give us a call or schedule your child’s first eye exam today with our office.

Ready to Schedule An Appointment?

We look forward to seeing you in our office soon. To schedule an appointment, click the schedule button or give our office a call.

Understanding Your Health Benefits

Health benefits can be tricky to navigate, specifically a Flexible Spending Account or FSA. FSAs can be a tremendous benefit when used correctly. Unfortunately, many people unknowingly forfeit money when their FSA renews, usually on January 1st.

What is a Flexible Spending Account (FSA)

A Flexible Spending Account is an excellent way for individuals to set aside additional funds to cover expected or unexpected healthcare costs throughout the year. When working with FSAs, employers typically offer a structure that allows employees to deposit part of their paycheck directly into their FSA before withdrawing taxes. That means you can cover qualified medical expenses with pre-taxed income. 

However, there are some stipulations to FSAs that are important to know before getting started. FSAs have a “use it or lose” rule. This means the money accumulating in your account throughout the year needs to be used by the end of the year, or you lose access to using it on your healthcare expenses. 

Understanding Your Options

Not everyone has an FSA. If you are unsure if your company offers an FSA or if you are enrolled in it, start by reaching out to your company’s benefits coordinator, usually your HR Manager. They will provide you with the necessary information to become informed about your health benefit options. 

If you have an FSA, be sure to understand these key parts of your plan.

  • Your total contribution per pay period.
  • What your employer contributes (if they do).
  • How to submit a claim and receive the reimbursement.
  • Any details around the plan’s potential grace period or carryover. 

A grace period, usually two to three months, allows an employee to submit a claim that may go past the end of the calendar year. If you have a standard FSA that expires on January 1st, your grace period might extend to mid-March. While not all plans offer carryover if your’s does you may be allowed to keep up to $550 for the following year’s expenses. 

Making a Plan

Don’t be one of the people who lose a portion of their income by not using their FSA funds! Once you understand your plan’s details, make a plan for how to spend your money. Not all healthcare expenses qualify for an FSA reimbursement. However, the eye exam you have been putting off, that second or backup pair of frames, or even additional contact lenses when you are getting low all qualify. 

Want to learn more about your benefits or how to use your flex spending on necessary eye care needs? Schedule an appointment today or give us a call! 

Ready to Schedule An Appointment?

We look forward to seeing you in our office soon. To schedule an appointment, click the schedule button or give our office a call.

The Importance of a Yearly Eye Exam

Your vision is one of your five senses responsible for allowing you to enjoy the world around you and create unforgettable memories. We may be biased, but we think vision is the greatest of the five senses! The only way to guarantee you will see your best year after year is by scheduling a comprehensive eye exam today!

Why are yearly eye exams important? Here are our top three reasons: 

  • Eye exams & clear vision help increase success at school, work, and more.
  • Exams can catch asymptomatic conditions before vision loss occurs.
  • Eye exams can provide insight into other health-related issues. 

A Clear Vision to Success

According to experts, 80% of the information presented in school is visual! Based on this statistic, you can see clear vision is essential to a child’s success in the classroom. Help your children feel prepared during their school year by scheduling a yearly eye exam. 

Vision Screenings Vs. An Exam

Schools commonly provide vision screenings to help detect vision problems in younger children. However, a vision screening is not a replacement for a yearly comprehensive eye exam. Screening tests cannot diagnose the problem. These tests cannot detect any health concerns we may find during a standard eye exam but only flag that a comprehensive eye exam is needed.   

Improving Your Visual Comfort 

Yearly exams aren’t just essential for your child’s success, but your own as well! In addition to the health insights, we will mention below, a yearly eye exam allows you to improve your vision comfort at home and at work! According to recent studies, daily screen time use is set to surpass 8 hours! With almost a third of your day on a digital device, a pair of blue light-blocking lenses may be the perfect addition to your attire. 

Reducing Your Risk of Eye Disease

As you age, you develop a higher risk for many medical eye diseases. Some eye-related conditions can appear with no symptoms, affecting your long-term vision health. Specifically, many people who develop glaucoma often don’t show symptoms at first. Individuals suffering from glaucoma usually develop irreversible vision loss before they have learned that something is wrong. A routine exam can detect signs like high eye pressure and other early signals before any serious damage to your vision occurs.

Detecting Issues During Your Annual Eye Exam

An annual comprehensive eye exam can detect changes in your body that may result in other health-related issues. For example, your eyes can tell us if you have diabetes, high blood pressure, high cholesterol, or even cancer. During your eye exam, our doctors will evaluate many aspects of your eye health, including the blood vessels in your retina, which are predictors of the health of blood vessels throughout your entire body. 

Reduce your risk for diabetes, hypertension, hypercholesterolemia, and other health conditions by scheduling your exam today. Questions? Contact our office via phone or search our website for more information. 

Ready to Schedule An Appointment?

We look forward to seeing you in our office soon. To schedule an appointment, click the schedule button or give our office a call.

What is Myopia Control?

While the term myopia control may sound unfamiliar or scary, it may be a perfect fit for your family’s eye care needs! Myopia control is the medical term used to describe specific treatments to slow the progression of nearsightedness in children. According to healthychildren.org, nearsightedness is a common vision problem that often begins between 6 and 14 and affects roughly 5% of preschoolers, 9% of school-aged children, and 30% of adolescents. 

Your Child’s Eye Development

Myopia occurs when the eyeball is too long (from front to back) or if your eye’s cornea is too curved. As a result, the light that enters your eye falls short of the retina, causing your eye to have a harder time focusing the way it should. This lack of focus results in distant objects being blurry and close objects being clear. 

Myopia generally gets worse through adolescence, which is why we see increasing percentages of myopia in older age groups. In most cases, an individual’s prescription will start to stabilize in their early twenties. However, for some this stabilization may take longer and can result in higher myopia prescriptions later in life. Severe myopia can lead to a higher risk for some vision-threatening complications including, glaucoma, cataracts, retinal detachment, and even blindness.

Myopia Control Options

The good news is eye care professionals have four ways to offer myopia control treatment, listed below. Interested in learning what myopia control treatments we offer? Call our office to schedule an appointment today!

  • atropine eye drops
  • multifocal contact lenses
  • myopia control glasses
  • orthokeratology (ortho-k)

Atropine Eye Drops

Atropine eye drops dilate your pupils and can relieve focusing fatigue by temporarily limiting the eye’s ability to change focus automatically. This process, known as accommodation, may be what accounts for its effectiveness in reducing myopia progression in children. According to All About Vision, some studies have shown that atropine can reduce myopia progression by up to 77%. 

Multifocal Contact Lenses 

Multifocal contact lenses provide clear vision at all distances for people who have nearsightedness, farsightedness, astigmatism, and/or presbyopia. Some studies have revealed that multifocal contacts can also help slow the progression of myopia in some children. Results provided by one study found that the children who wore multifocal lenses daily had a 50% reduction in the progression of their myopia compared to the children who wore regular soft contacts. 

Myopia Control Glasses 

Multifocal eyeglass lenses work similarly to multifocal contacts and have similar results in the studies conducted to slow the progression of nearsightedness in children.

Orthokeratology 

Orthokeratology, more commonly referred to as ortho-k, involves specially designed gas permeable contact lenses worn only while sleeping and removed when awake. Based on your prescription, our team will recommend a treatment schedule intended to reshape your eye and reduce the lengthening of the eyeball over time. Ortho-K lenses reshape your eye at night and provide temporary vision correction during the day.

If your child is nearsighted, ask us about treatment options during your next exam! Our eye care team will help determine if myopia control is right for them. 

Ready to Schedule An Appointment?

We look forward to seeing you in our office soon. To schedule an appointment, click the schedule button or give our office a call.