What can you do to improve your sensory-motor skills?
The eyes which are outgrowths of the brain exert a considerable influence on general body functions and behavior. No fewer than 6 pairs of the brain’s 12 pairs of cranial nerves are involved in the process of vision. The bulk of what a sighted person does, and learns, is regulated by the ocular sensorimotor system and its relationship to vision information processing and general brain function. Ocular and visual processing efficiency are reduced when general body fitness is not optimal.
Nobody doubts the value of physical and mental fitness, but finding a program of regular physical exercise that is interesting, not excessively time consuming, and effective is a major challenge. The following exercises have been designed to improve sensory-motor integration under the control of vision. They represent an essential element of baseline fitness.
Their purpose is to coordinate seeing, hearing, moving, balancing, breathing and thinking. The exercises do not attempt to build muscle, but rather to build skills of mental and physical coordination.
In order to gain the most benefit from this routine, attention should be paid to the following:
- ensure the correct body posture and balance before starting each exercise*
- exercise at a level that feels comfortable and stop any exercise that causes pain*
- all breathing must be conscious, in and out through the nose, full and deep, slow, unforced and in rhythm to the movements of the body exercise*
Exercises Copyright © Dr. Selwyn Super
Ready To Start? Let’s Do It!
Exercise 1: Press Up Exercise
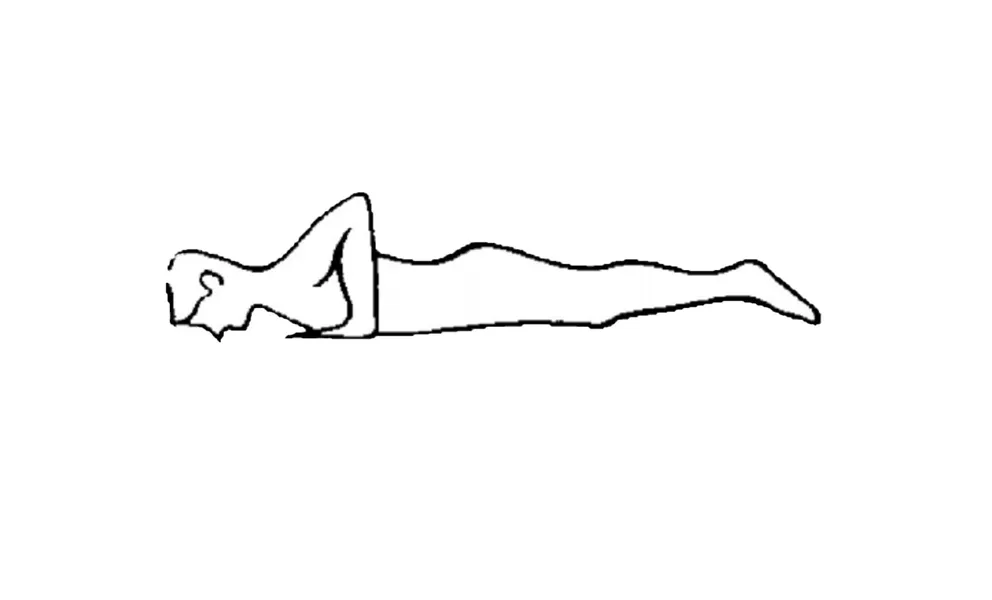
Step 1
Commence the exercise lying on the stomach, with hands palms down on the floor under the shoulders, and with your nose resting lightly on a brightly colored knitting needle. The needle should be placed lengthwise in line with the length of your body. In this position of the exercise, the needle should appear blurred and double.
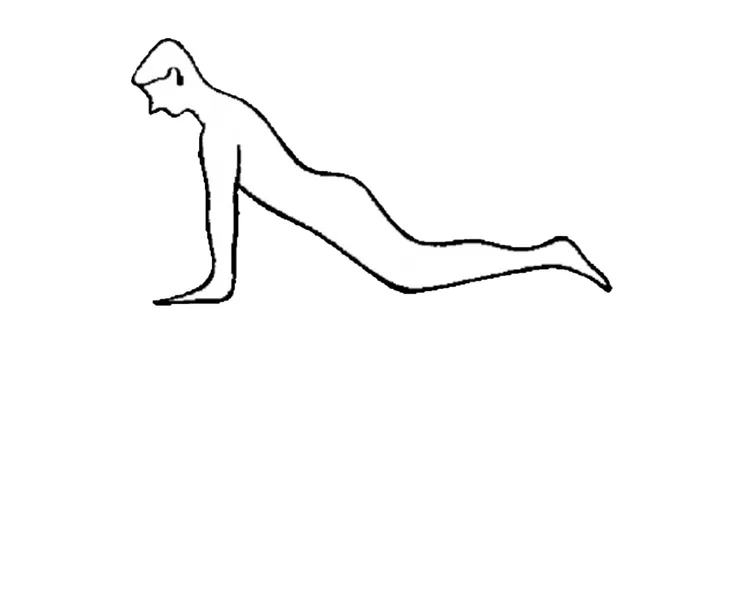
Step 2
Now raise the upper part of your body while breathing in through your nose and while straightening your arms and keeping your knees on the floor. Concentrate on the needle and notice that it loses its blurred and double image and appears clear and single. Now bend your arms while gently lowering yourself to the floor. Concentrate on the needle and notice when it starts to go blurred and double. (The distance from the floor where the needle appears to go blurred will be influenced by your age and any refractive error you may have. The distance from the floor where the needle appears to go double will be dependent on you ability to converge your eyes, (i.e. the ability to turn your eyes inwards)).
Conclusion
Do as many press ups as feels comfortable. Remember to do the exercise slowly and as rhythmically as possible and paying simultaneous attention to your breathing, thinking, balancing, seeing, hearing and moving.
Exercise 2: Horizontal Arm Swinging Exercise
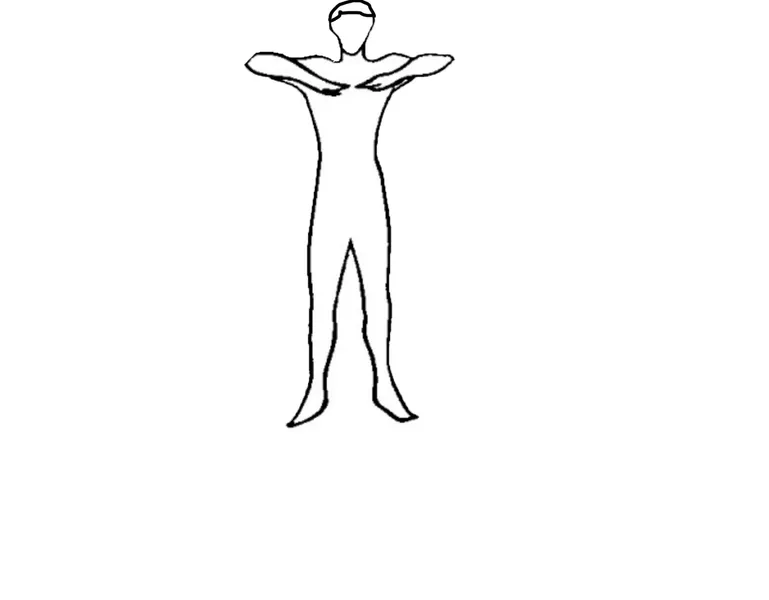
Step 1
Commence the exercise standing erect with the feet apart and your arms raised to shoulder level with your elbows bent so that your hands touch each other, palms down, on your chest.
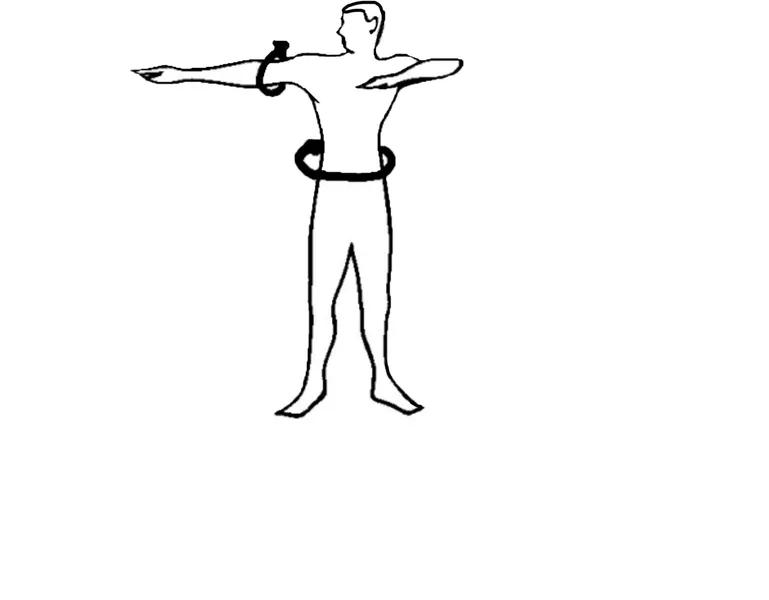
Step 2
Now while your left arm remains passive, straighten the elbow of your right arm and swing your arm outwards in a horizontal arc as far backwards as possible, moving your trunk from the pelvis in the same direction.
The visual component of this exercise requires you to focus on the shoulder of the right arm as it is being swung in its horizontal arc both backwards and forwards and then to do the same for the left arm.
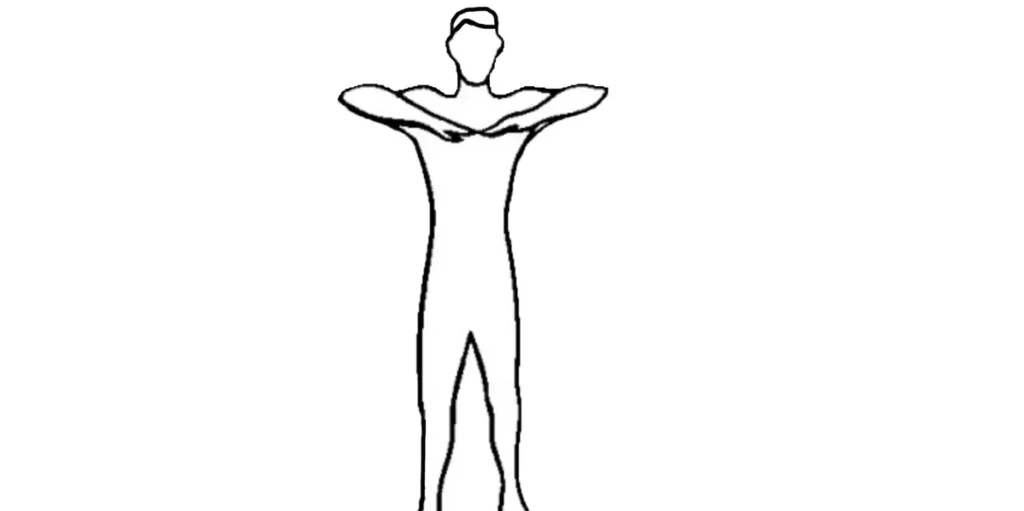
Step 3
The right arm is then swung back to the original position where both hands touch each other on the chest.
Now carry out the same movements for the left arm, while the right arm remains passive.
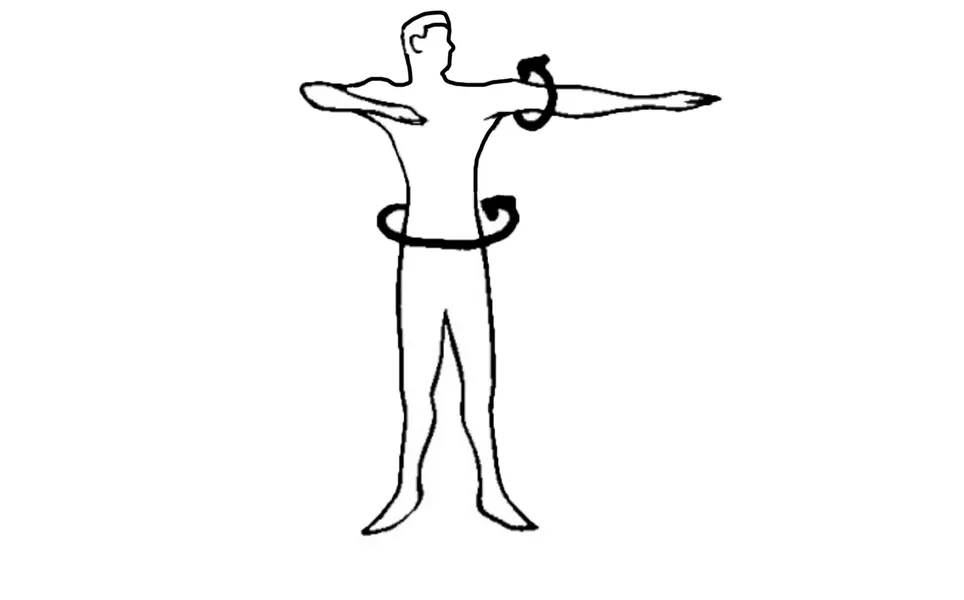
Step 4
The focus is then changed with each successive rotational backwards and forwards swing, so that the elbow, then the wrist, then the finger tips are focused upon and then, lastly, looking into the far distance along the line of the arm being swung.
After these five swings have been completed, looking successively at the different focal points, a new cycle of arm swings can be conducted, starting first by looking along the arm into the far distance and then successively with each swing, focusing on the finger tips, wrist, elbow, and shoulder of each arm being swung.
Conclusion
The breathing in this exercise may be conducted in two ways, i.e. breathing in, while swinging the arm outwards and breathing out while swinging the arm inwards towards the front, or by doing this in reverse.
By carrying out the visual and breathing components in two different ways described, you will have swung your arms some forty times in all.
Remember to do the exercise as rhythmically as possible and paying simultaneous attention to your breathing, thinking, balancing, seeing, hearing and moving.
Exercise 3: Knee Squat Exercise
Step 1
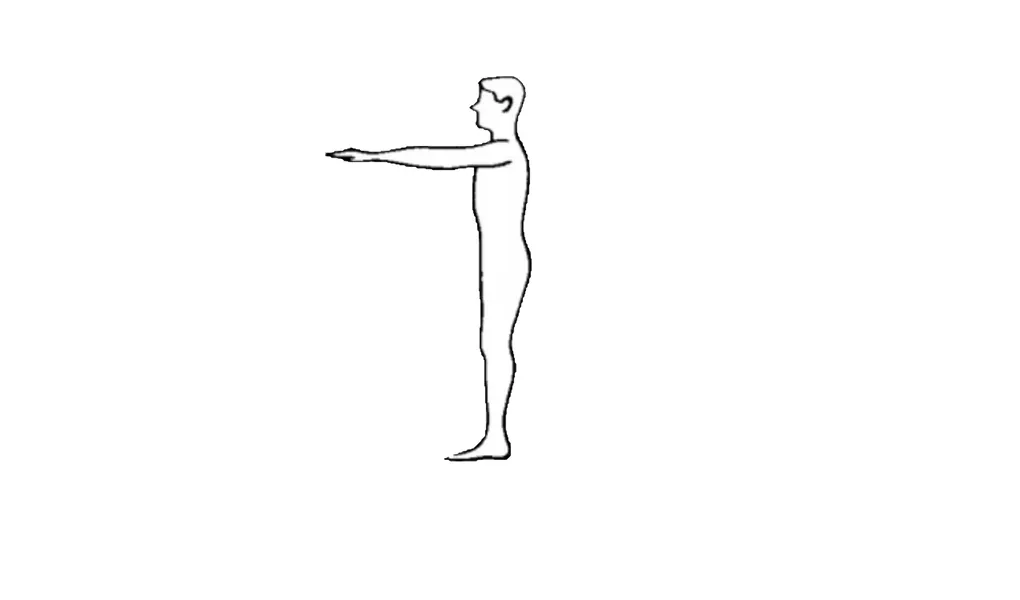
Commence the exercise standing erect with legs together and your feet turned slightly outwards and your arms stretched outwards parallel in front of you at shoulder height. The palms of your hands should be facing downwards in this position. Now look toward a distant, vertical object. (It could be an image of yourself in a long mirror in your room or a tree-trunk or a lamp-post outside your window).
Step 2
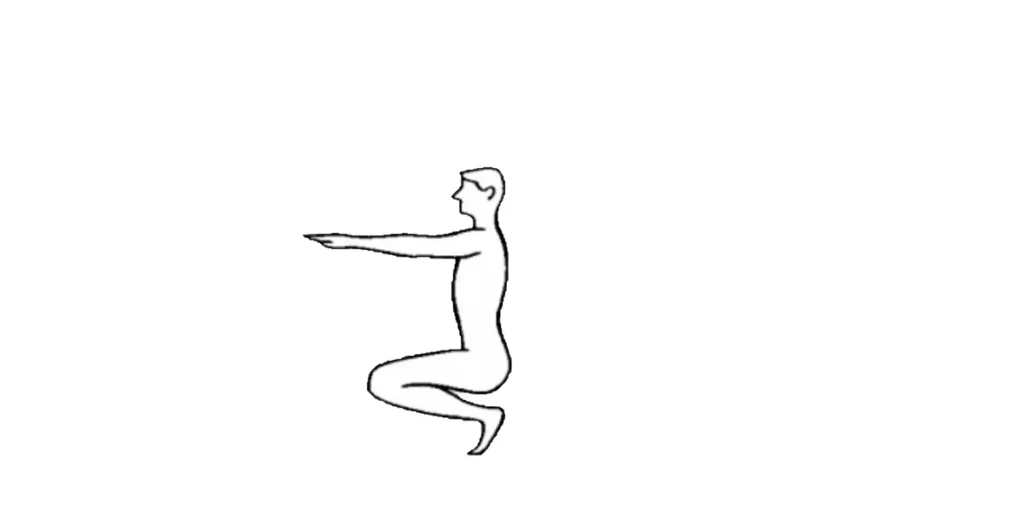
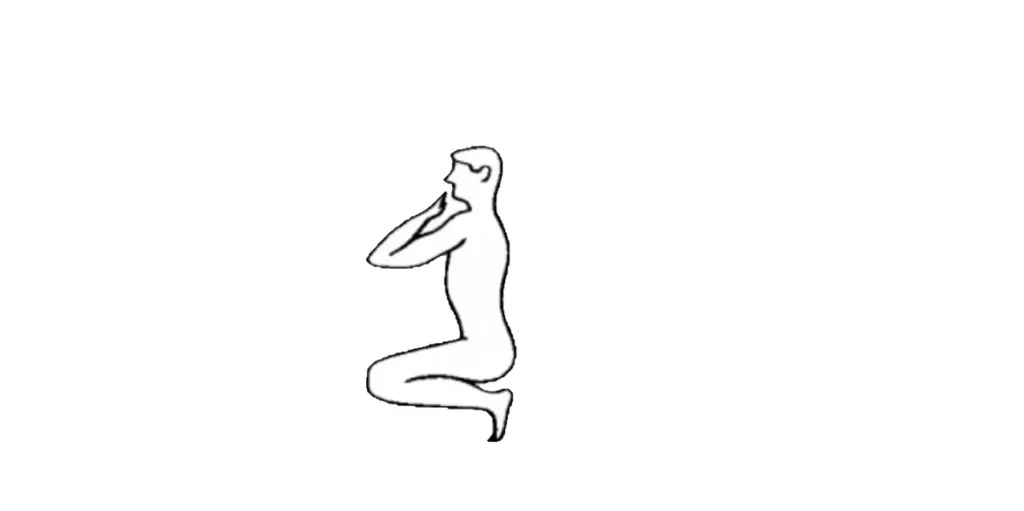
Concentrate on keeping the distant object in clear focus as you bend your knees to go down to a knee squat position. By lifting your heels off the ground and standing on your toes, this should help you retain your balance and to keep your back straight and vertical.
While going down to the knee squat position, your arms should remain stretched out parallel in front of you at shoulder height.
Step 3
When you have reached the knee squat position and you are sitting on your haunches as far as possible, bend your elbows so as to bring your hands together, palms down at shoulder height, which should be in line with the bottom of your nose. The tips of your middle fingers should touch each other gently at a distance closest to your eyes where they can still be seen clearly. It should be noticed at the same time that the distant object which you were looking at while going down into the knee squat position, is now very blurred and should also appear double.
Step 4
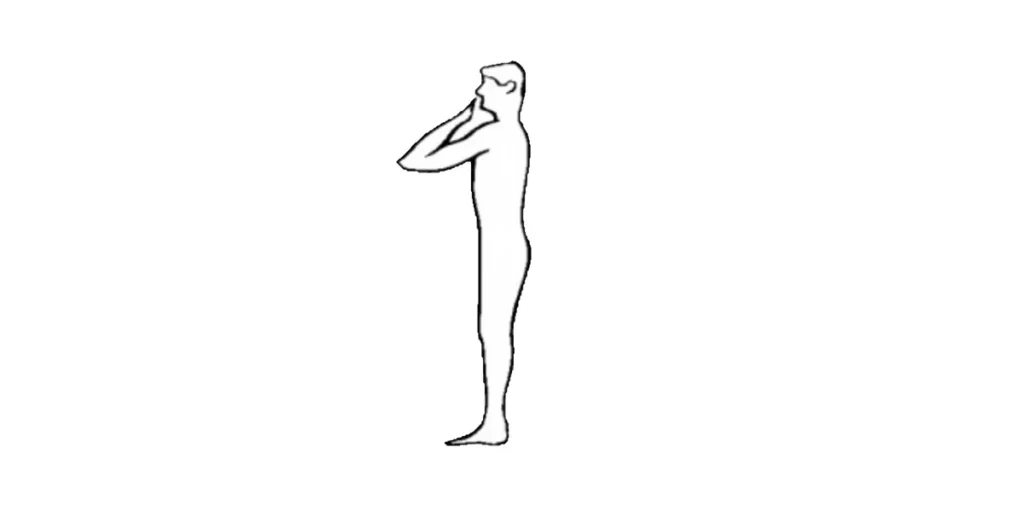
Now straighten your knees and rise slowly to the upright position keeping your elbows bent and your focus at the point where your two middle fingers touch close to your eyes. It is now time to straighten your arms again at shoulder height, parallel to each other and with hands palms down and to redirect your focus to the far distant object. Be conscious of the length of time that it takes to bring the object you are looking at into clear focus, and for the double images to merge into one. If the distant object does not appear double when you are looking at where your middle fingers meet, this means that your eyes have not converged properly and binocular vision with the two eyes working together is not being achieved.
Conclusion
Now reverse the procedure so as to be looking near on going down into the knee squat position and to be looking far on coming up. Again do as many knee squats in this way as feels comfortable.
Remember to do the exercise as slowly and rhythmically as possible and paying simultaneous attention to your breathing, thinking, balancing, seeing, hearing and moving.
Exercise 4: Trunk Raising and Lowering Exercise
Step 1
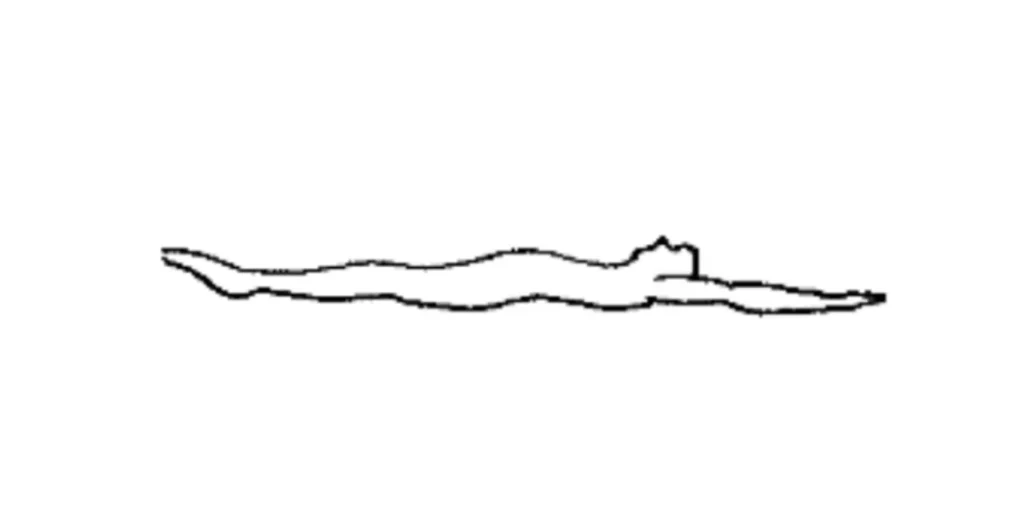
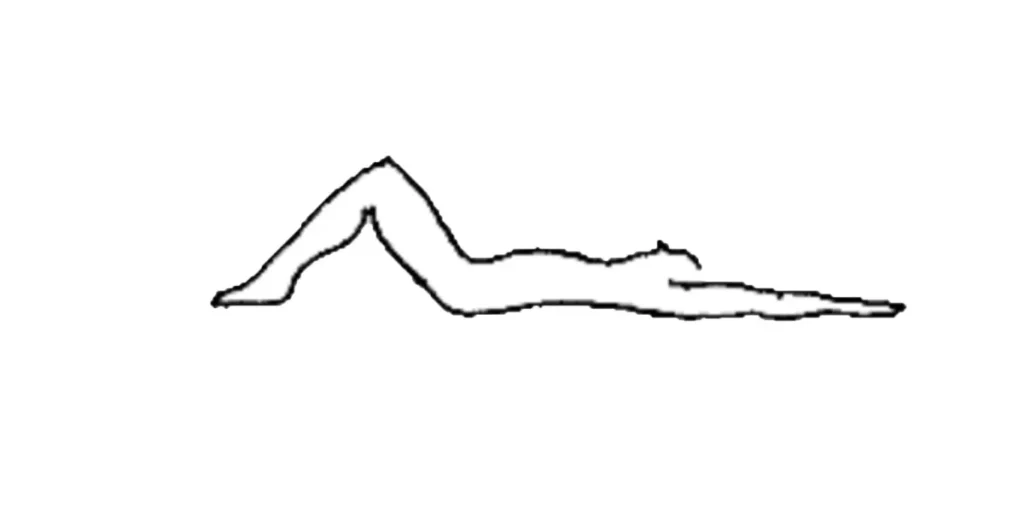
Commence this exercise lying on your back with your legs together stretched out in front of you, and your arms stretched out behind your head. The palms of your hands should be facing upwards and your hands should be touching each other lightly and resting on the floor. In this stationary position, look behind you as far as possible at a distant object and breathe in slowly through your nose until your lungs are full and you cannot hear the sound of the air you have been inhaling anymore.
Step 2
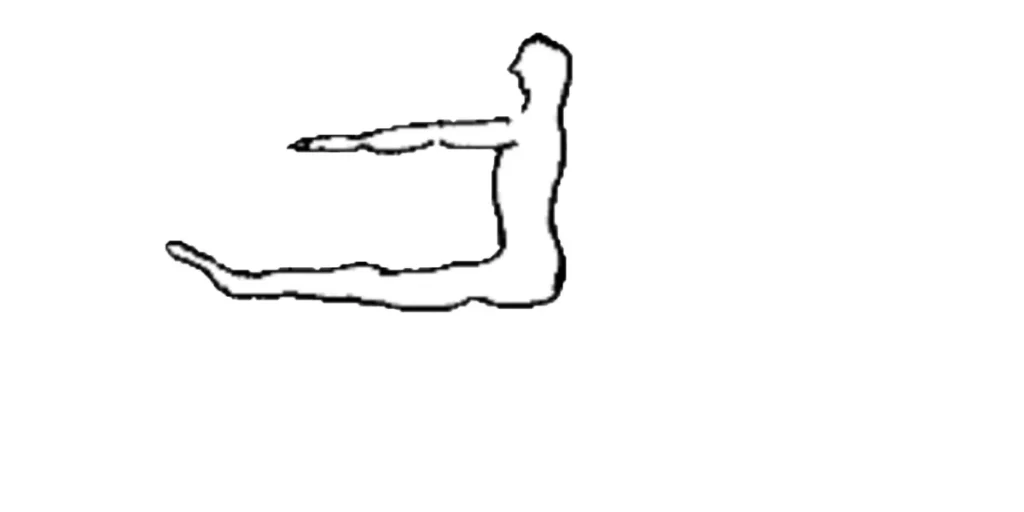
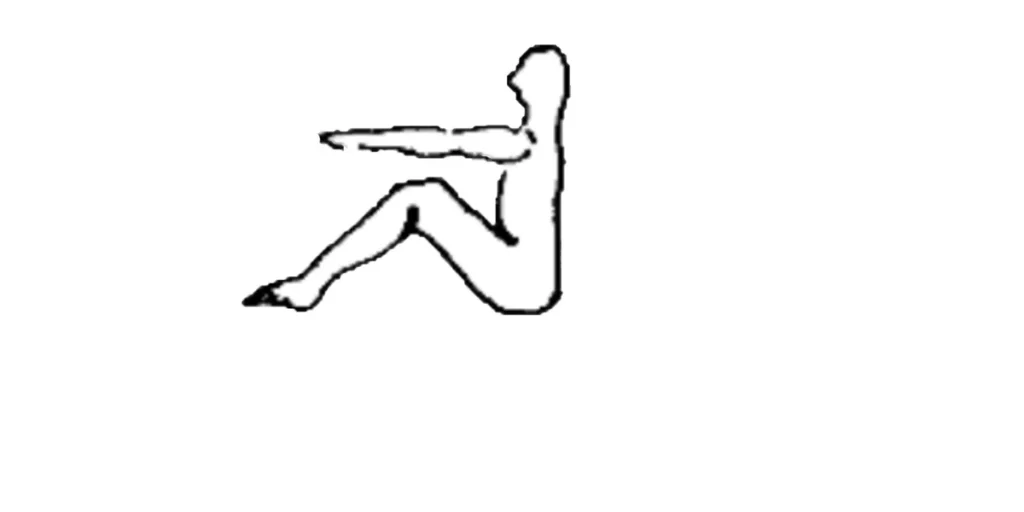
Now sit up slowly moving your arms over your head at the same time, until you reach a position where your arms are stretched out in front of you and are parallel to the floor. As soon as you start moving you should breathe out slowly through your nose until your lungs are completely empty and you cannot hear the sound of the air you have been exhaling anymore. As you start moving your arms over your head, focus on your two touching hands as they come into sight and keep focusing on your hands until you are sitting up with your arms in front of you and your palms are now facing downward. While stationary, look as far in front of you as possible at a distant object and breathe in through your nose until your lungs are full and you cannot hear the sound of the air you have been inhaling.
Step 3
Now change your focus to where your hands, palms down are touching and while moving back to the floor commence breathing out through your nose while stretching your arms back over your head to reach the resting on the floor position. At the same time you commence moving back to this resting position, straighten your legs so that they will also rest on the floor in the original starting position of the exercise.
Step 4
Do as may sit ups as feel comfortable. Remember to change the legs position alternating legs straight with knees bent every time you go back to the lying on the floor position and maintaining the one or other leg position as you move to the sitting posture. Remember, too, to breathe in while you are stationary and looking either far behind, or far in front of you, and to look near at where your hands touch while you are moving and breathing out.
Conclusion
Lastly, remember to do the exercise as slowly and rhythmically as possible and paying simultaneous attention to your breathing, thinking, balancing, seeing, hearing and moving.
Well Done!
In order to gain the most benefit from this routine, attention should be paid to the following:
- ensure the correct body posture and balance before starting each exercise
- exercise at a level that feels comfortable and stop any exercise that causes pain
- all breathing must be conscious, in and out through the nose, full and deep, slow, unforced and in rhythm to the movements of the body exercise*
Copyright © 2022 Dr. Paul Super OD PC – All Rights Reserved
Ready to Schedule An Appointment?
We look forward to seeing you in our office soon. To schedule an appointment, click the schedule button or give our office a call.
